This semester in college, we had a Social Problems Solving Hackathon -HackForTomorrow- in which my team was contesting within the topic category of ‘Disaster Management’. We were pushed by the emotion of fear brewing among the people of our locality towards what eventually turned out to be a horrendous disaster. Though we couldn’t get it all together till after the event, we sure did get into the final stages of the parent competition a Social initiative of the College fest by the name of iBeTo with our project OpenSalve.
This though is not going to be the story of how we built the project. It is a log of how I moved the project from using a virtualenv setup to one that’s way easier to setup as is shown in the PR subins2000/OpenSalve#9: virtualenv ~> pipenv and other minor changes. In addition, now out project also adheres to most standards set by Python.org!
Reasons
I had started work on the project at the behest of Subin Siby(@subins2000) for building a blockchain to validate transactions between volunteers and the govt. I did not work on the same as I had strongly disagreed on two fronts, first that I would not work on a centralized blockchain as its can instead be implemented as a database, albeit more easily, but also because I was unable to build a system to make things both decentralized and reliable.
Kenneth Reitz - Pipenv: The Future of Python Dependency Management - PyCon 2018
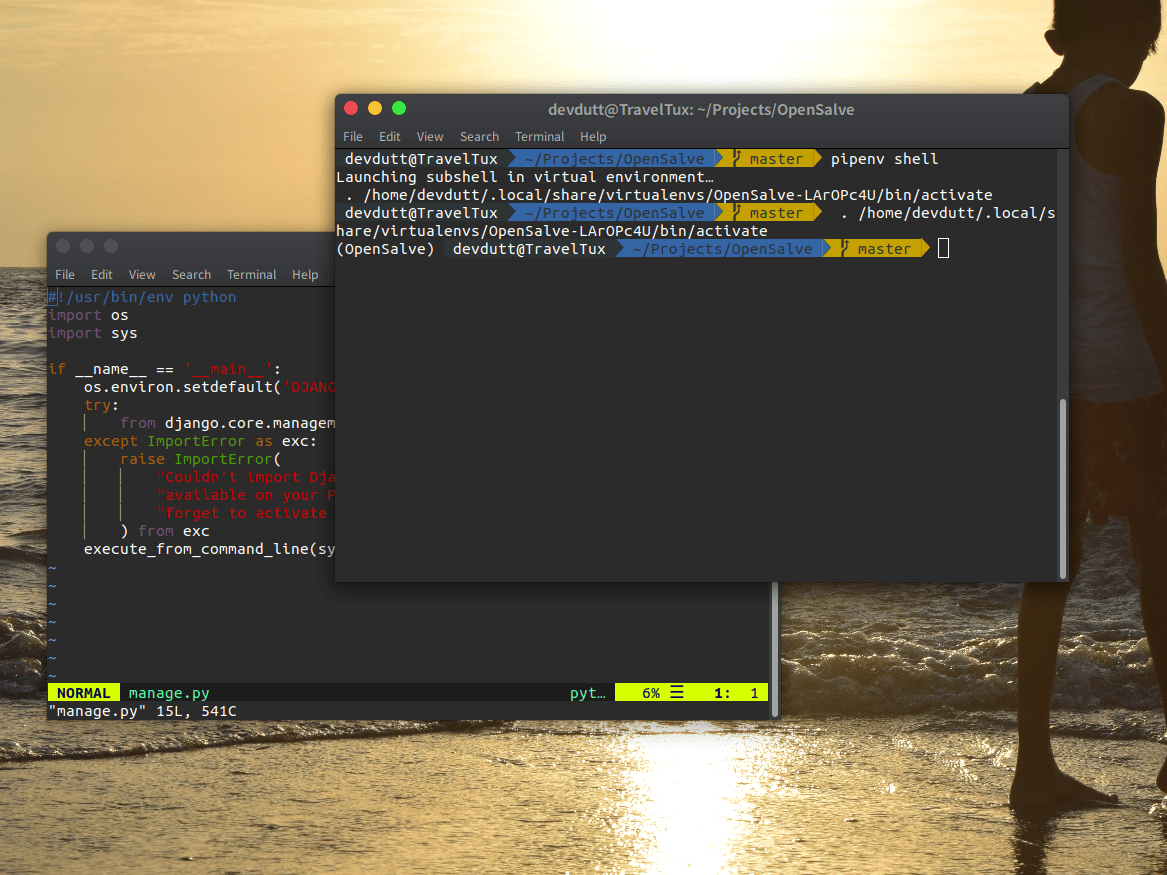
But in parallel the setup procedure for the development of this project wasn’t helping either. At this point the project was using virtualenvwrapper to do most of it’s environment setup. I agree, it is a great tool, and as such Virtualenv is also provided by the same people as is Pip and Pipenv, but I was also sure the project would greatly benefit from the change. Pipenv as such provides the abstraction of the setup process and also allows for a shell to be setup within the environment.
Two targets, one tool! Who wouldn’t fall for such a charming product?
– Devdutt Shenoi (I know, I’m quoting myself :P)
Changes
Prior to the change, the process for install was pretty complex, here is the comand one needs to execute, to get started:
export VIRTUALENVWRAPPER_PYTHON=/usr/bin/python3
source ~/.local/bin/virtualenvwrapper.sh # Better add this to .bashrc
mkvirtualenv opensalve
rm $VIRTUAL_ENV/bin/postactivate
ln -s `realpath .env/postactivate` $VIRTUAL_ENV/bin/postactivate
Where as now, its a bit less complicated ;-;
pipenv installI don’t kid you, that’s it. Now you know why saying its less complicated is an
understatement. XD
Hashes are used everywhere, always. Security. Automatically expose security vulnerabilities.
While you might be asking ‘where is the process for linking the environment variables file?’, let
me console you with the fact that all these variables can now be housed within the .env file. So
in our case .env looks like this:
DJANGO_SECRET_KEY='key here'Whereas in the past this used to be done either manually, or as is pointed out in the above code within a
file .env/postactivate which looked like:
# Generate using https://gist.github.com/ndarville/3452907#gistcomment-1172571
export DJANGO_SECRET_KEY='key here'
Even the requirements.txt file is now retired in favour of a more “Strict”
Pipfile and Pipfile.lock combo, much like there exists within node/npm files that
define dependencies and their requierments in either the development or production stages.
Conclusion: Pipenv is the tool that every Python developer must learn, we finally are in the age of better code. I leave you with a quote from Jannis Leidel, former pip maintainer.
- Pipenv is the porcelain I always wanted to build for pip. It fits my brain and mostly replaces virtualenvwrapper and manual pip calls for me. Use it.